Understanding Amazon EC2: A Beginner's Guide
Amazon Elastic Compute Cloud (Amazon EC2) is a web service that provides resizable compute capacity in the cloud.
In Simple words, EC2 is creating a computer over the browser and accessing that virtually.
Access reliable, scalable infrastructure on demand. Scale capacity within minutes with SLA commitment of 99.99% availability.
Benefits of EC2
Scalability: It helps to easily scale the instances up or down based on the demand with ensuring the optimal performance and cost-efficiency.
Flexibility: It provides wide variety of instance types and configurations for matching different workload requirements and operating systems.
Cost-Effectiveness: It comes with providing Pay-as-you-go model with options like On-Demand, Reserved, and Spot Instances for managing cost efficiently.
High Availability and Reliability: It offers multiple geographic regions and availability zones for strong fault tolerance and disaster recovery.
AWS EC2 Instance Types
1. General Purpose Instances
It provides the balanced resources for a wide range of workloads.
It is suitable for web servers, development environments, and small databases.
Examples: T3, M5 instances.
2. Compute Optimized Instances
It provides high-performance processors for compute-intensive applications.
It will be Ideal for high-performance web servers, scientific modeling, and batch processing.
Examples: C5, C6g instances.
3. Memory-Optimized Instances
High memory-to-CPU ratios for large data sets.
Perfect for in-memory databases, real-time big data analytics, and high-performance computing (HPC).
Examples: R5, X1e instances.
4. Storage Optimized Instances
It provides optimized resource of instance for high, sequential read and write access to large data sets.
Best for data warehousing, Hadoop, and distributed file systems.
Examples: I3, D2 instances.
5. Accelerated Computing Instances
It facilitates with providing hardware accelerators or co-processors for graphics processing and parallel computations.
It is ideal for machine learning, gaming, and 3D rendering.
Examples: P3, G4 instances.
Pricing of AWS EC2 (Elastic Compute Cloud) Instance
On-Demand Instances:
The On-Demand instance is like a pay-as-you-go model where you have to pay only for the time you are going to use if the instance is stopped then the billing for that instance will be stopped when it was in the running state then you are going to be charged. The billing will be done based on the time EC2-Instance is running.
Charged per second or hour of usage, offering maximum flexibility.
No upfront commitment: Ideal for short-term workloads, testing, or unpredictable usage patterns.
Scalability: Easily scale instances up or down based on real-time needs.
Availability: Guaranteed instance availability within your chosen AWS region.
Reserved Instances:
Reversed Instance is like you are going to give the commitment to the AWS by buying the instance for one year or more than one year by the requirement to your organization. Because you are giving one year of Commitment to the AWS they will discount the price on that instance.
Significant cost savings for predictable, sustained workloads.
Guaranteed capacity: Ensures availability of the specified instance type during your reservation term.
Spot Instances:
You have to bid the instances and who will win the bid they are going to get the instance for use but you can’t save the data which is used in this type of instance.
Lowest cost option for workloads that can tolerate interruptions.
The price fluctuates based on supply and demand.
Use Cases of EC2
Hosting websites and applications.
Running batch jobs.
Building and deploying cloud-native applications.
Setting up development, testing, and staging environments.
Creation of EC2 Instance
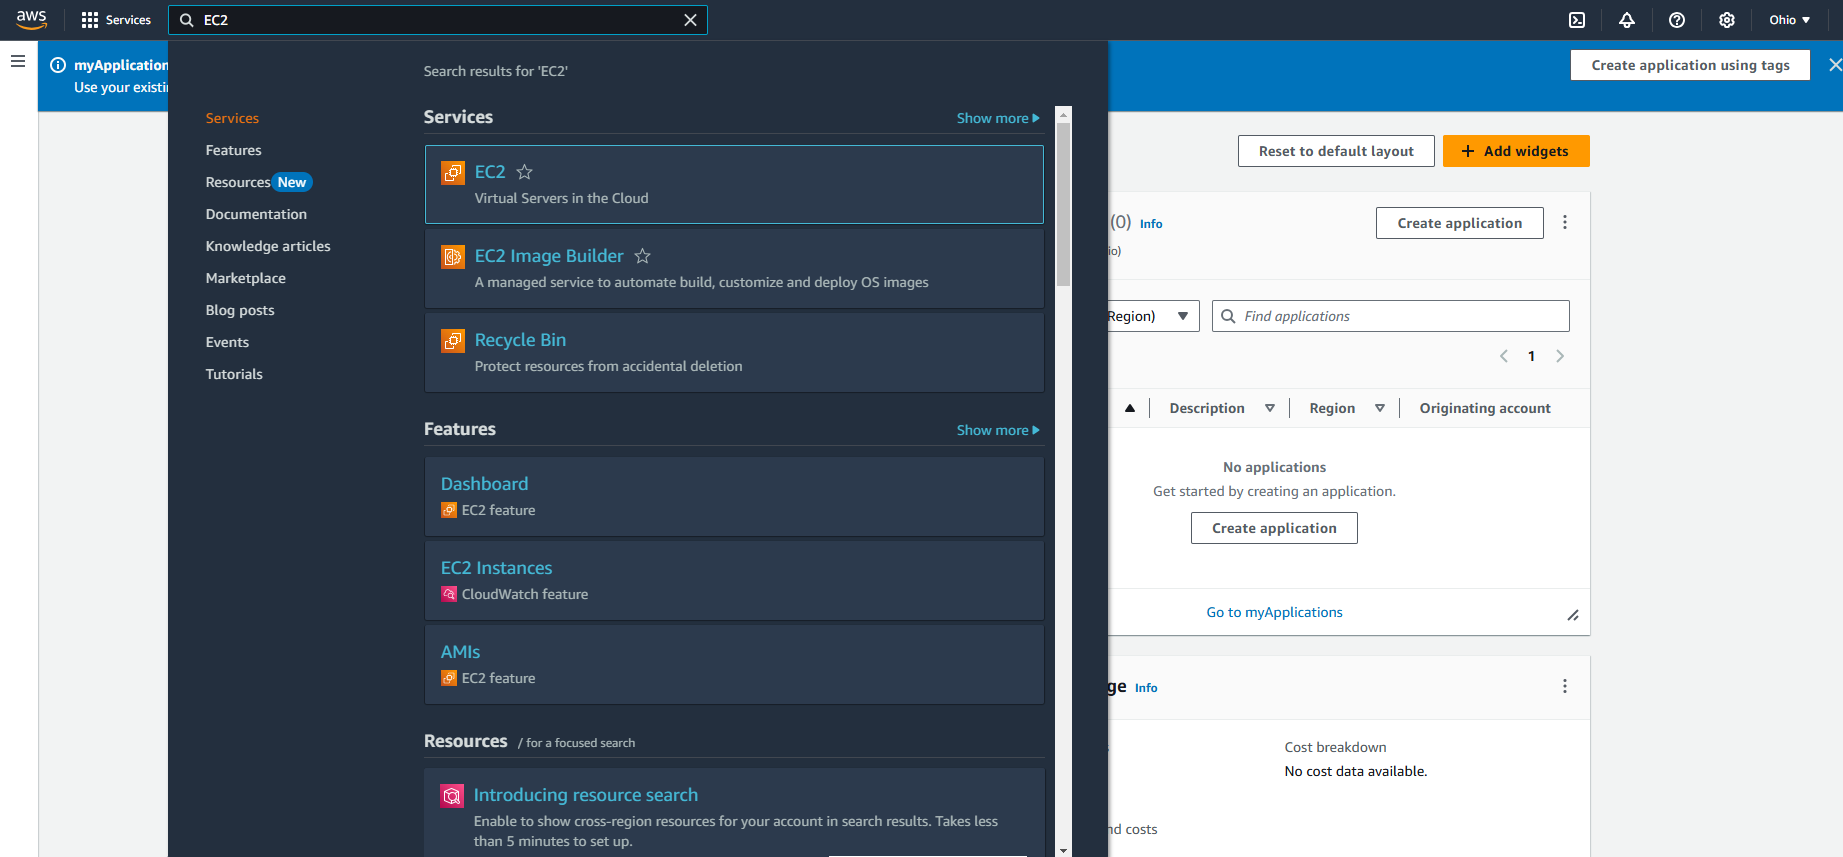
To find the EC2 service, enter the keyword “EC2” into the search bar at the top of the AWS console and select the first result for EC2.
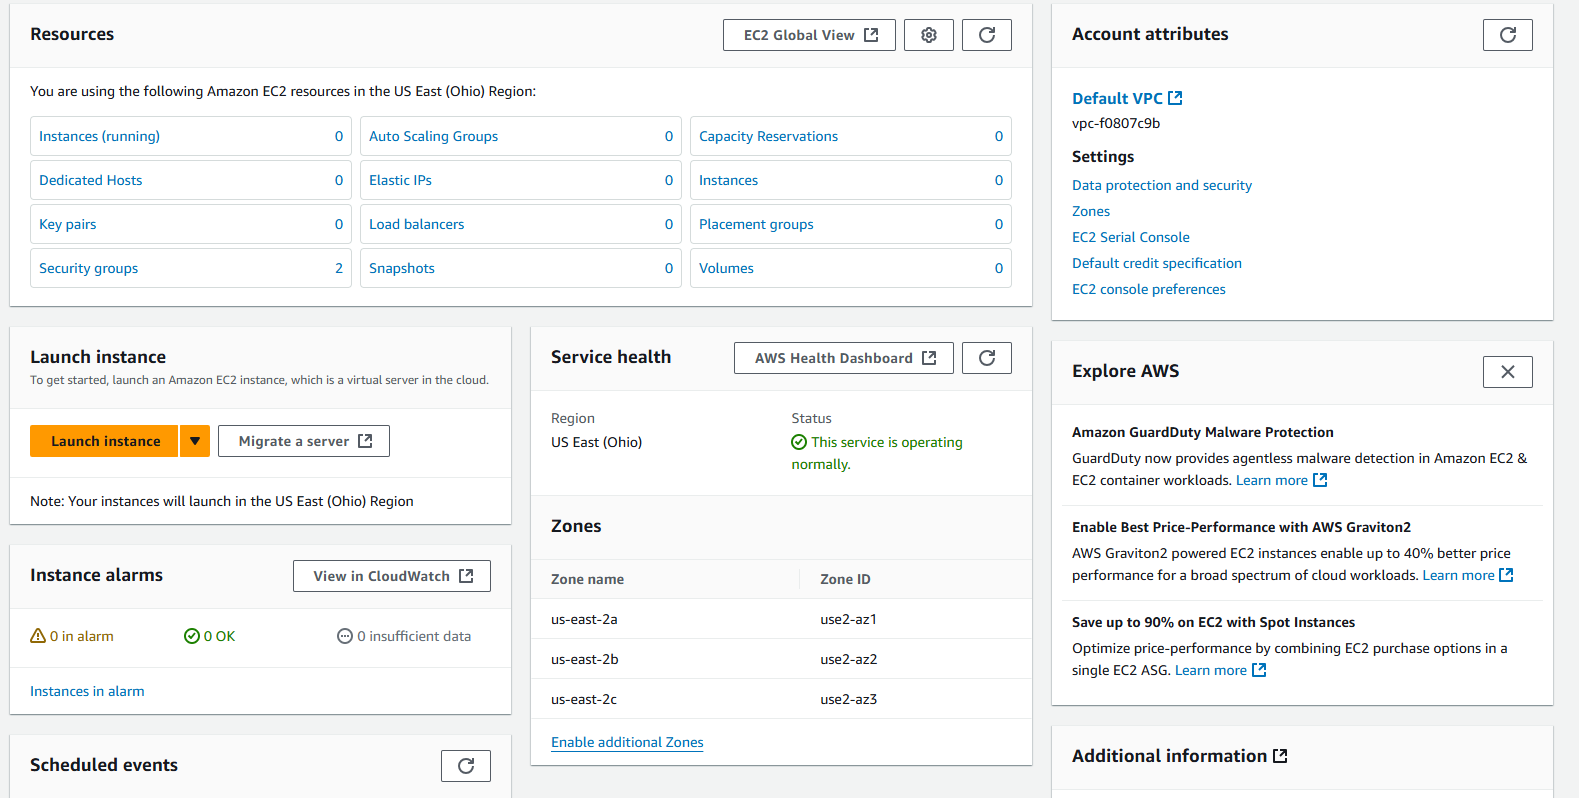
Click on "Launch Instance" from the EC2 instances page.
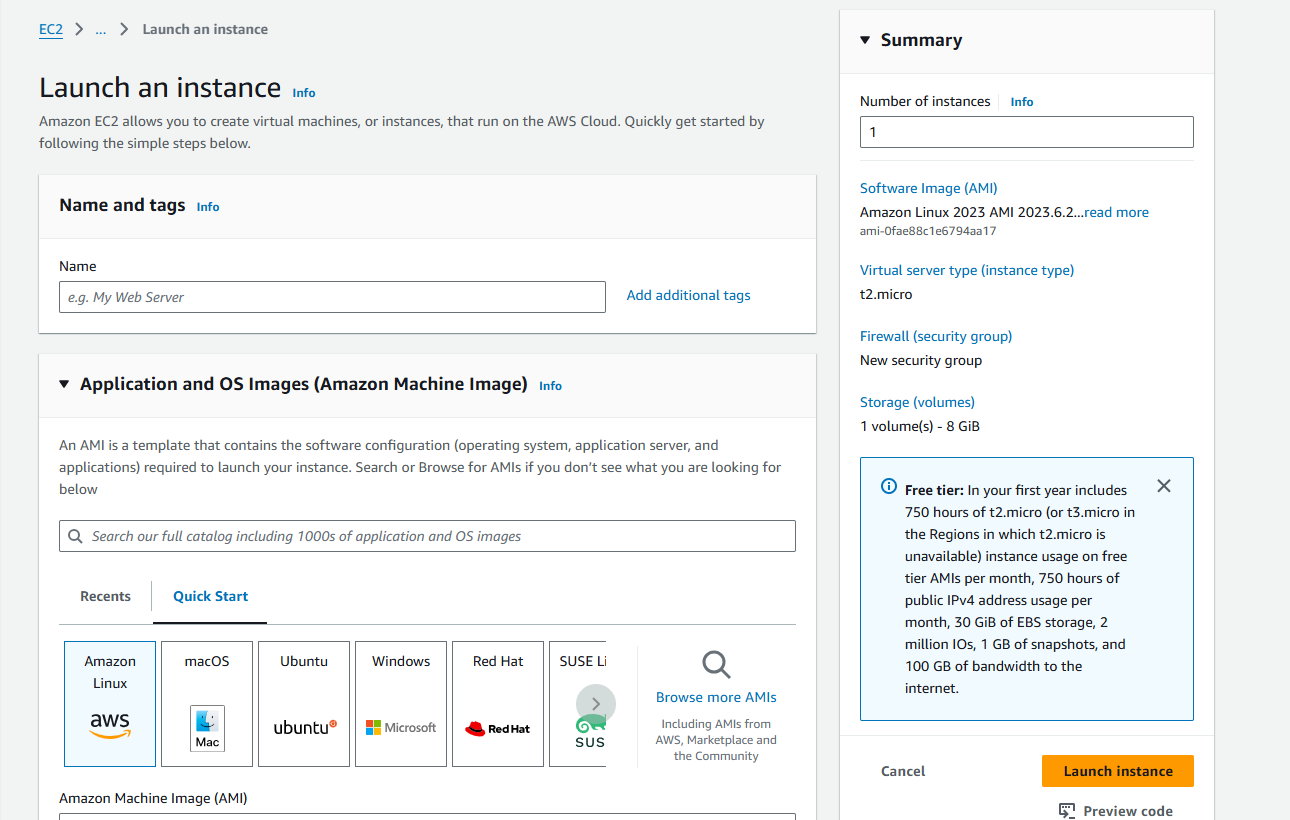
Enter Server name and select the AMI(Application and OS Images).
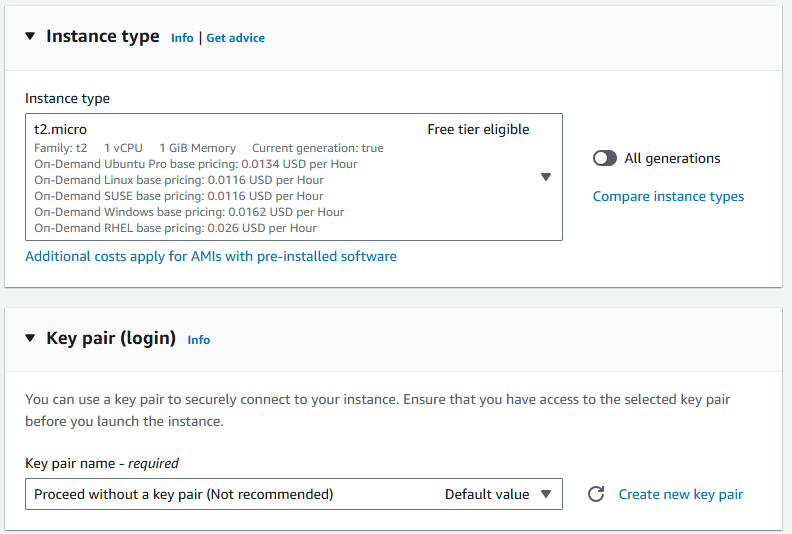
Select the instance type and choose a key pair, or select “Proceed without a key pair” for now.
In the Network settings, click on "Select existing security group" and then choose the default group from the dropdown menu.
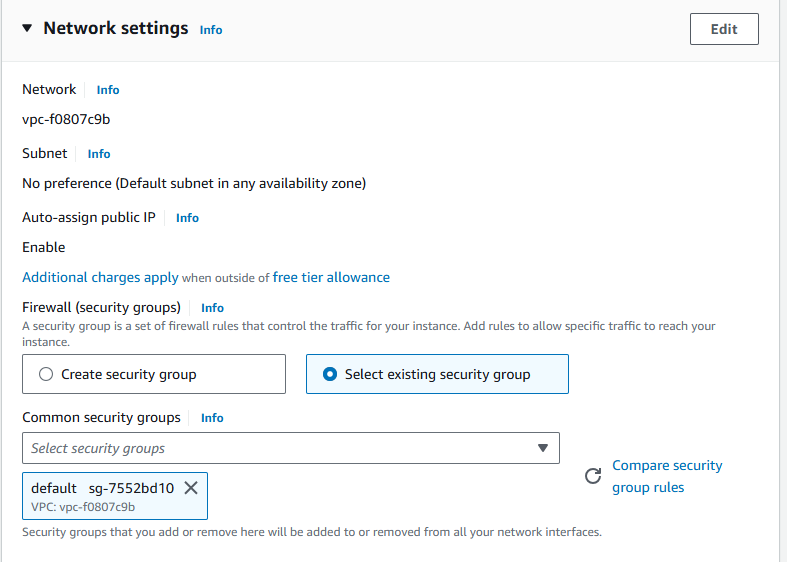
Click on “Launch Instance”
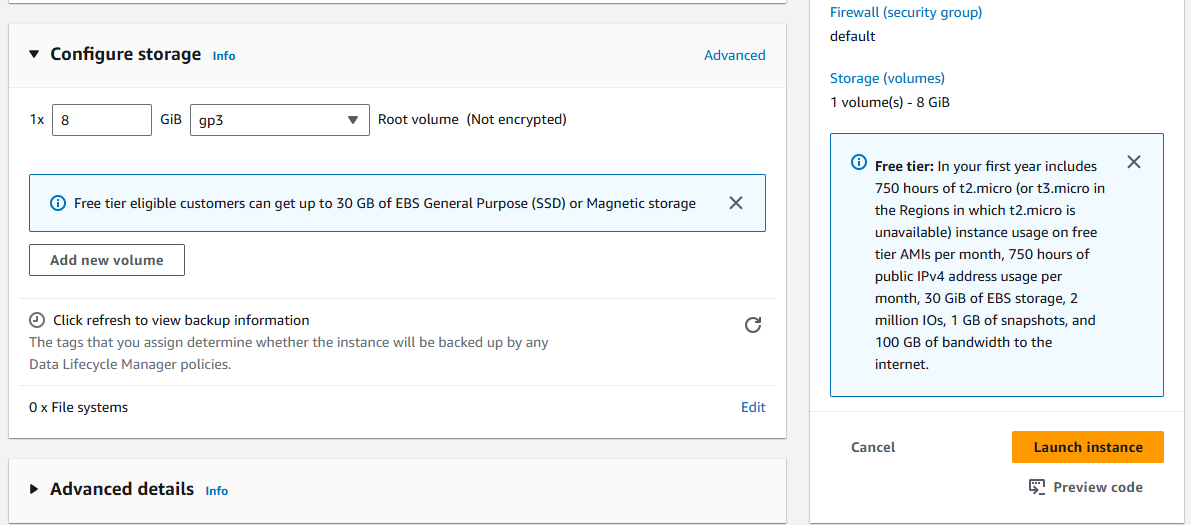
Created server in reflect in “instances” page.

Clicking on the instance ID opens detailed information about the instance. then click on “connect”.
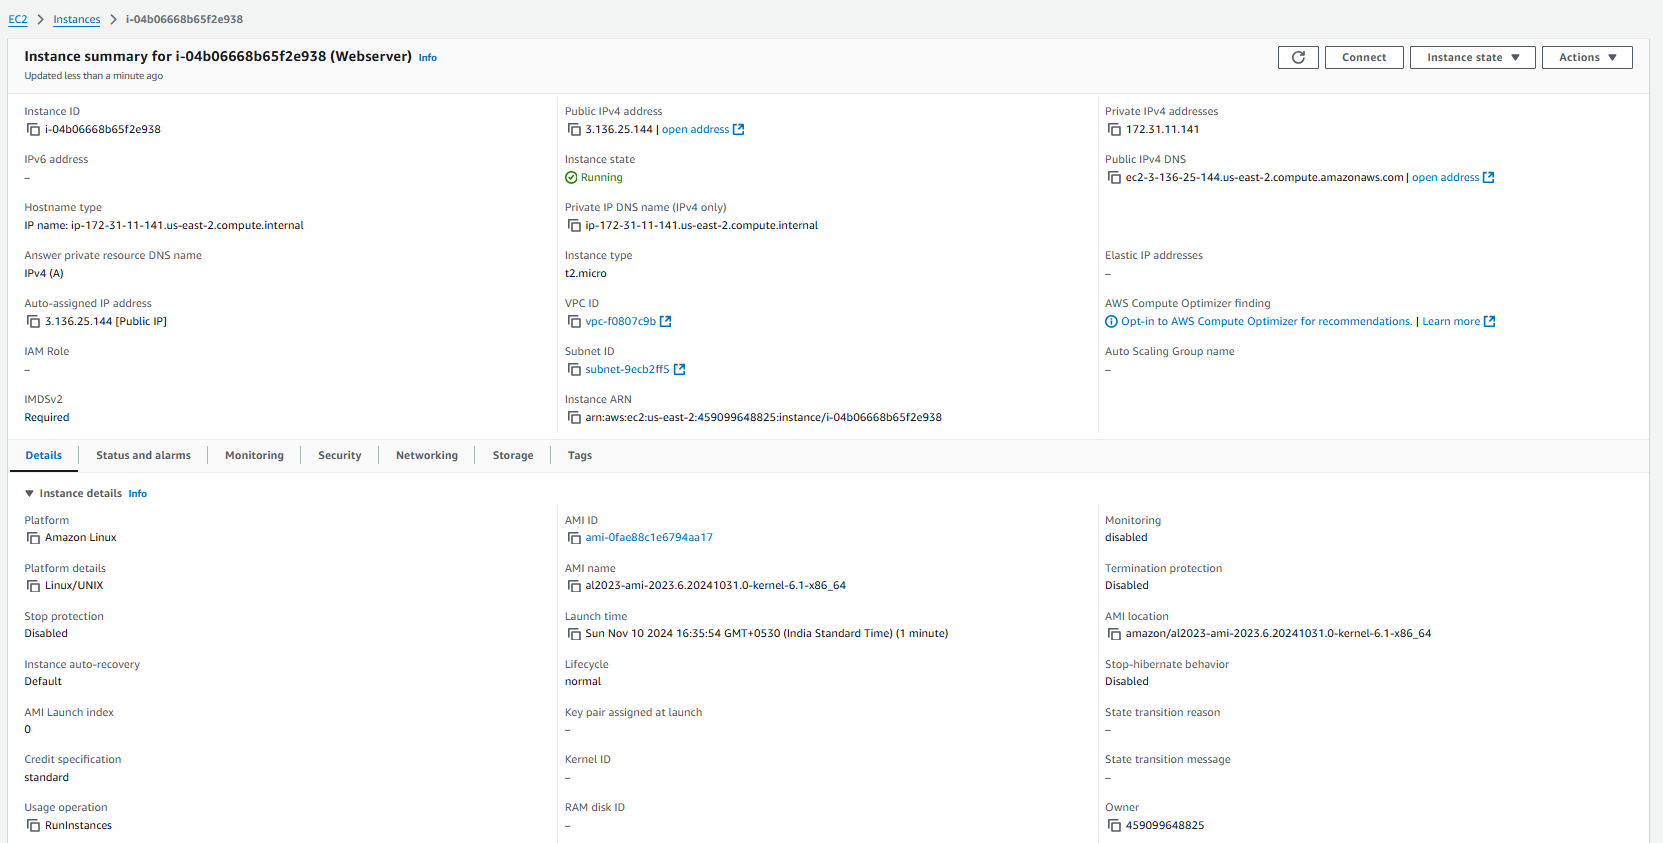
Click on “connect” to connect to the server.
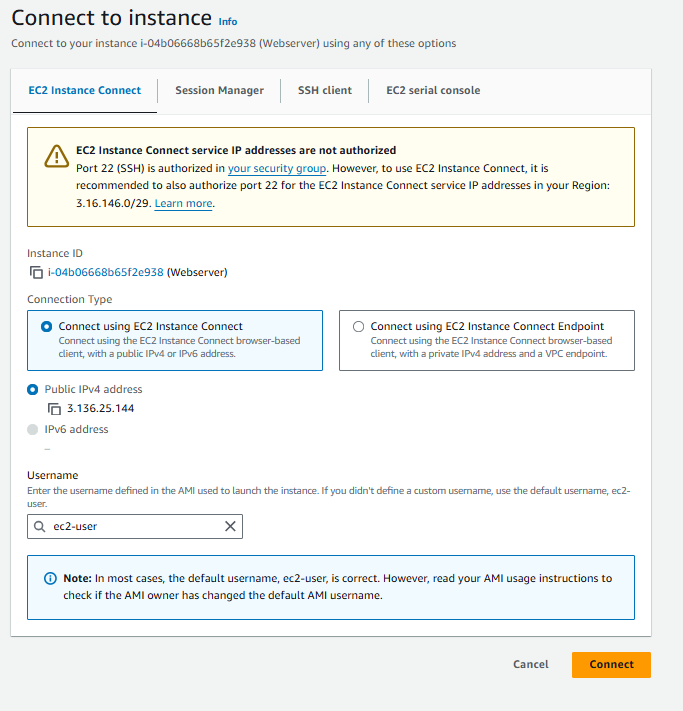

As shown its shown “Failed to connect to your instance”. This is because security group is not defined.
Let's learn about Security Groups.
A security group in the context of Amazon EC2 is essentially a virtual firewall that controls the traffic for one or more instances.
It acts as a virtual firewall for your EC2 instances to control incoming and outgoing traffic.
Inbound and Outbound Rules
Inbound traffic rules control incoming traffic to the instances, and outbound rules control outgoing traffic. These rules make sure only allowed traffic can reach your service. It helps define which types of traffic are allowed to pass through the security group and access your service.
Custom and Default Security Group
Amazon EC2 has a default security group. If you don't pick a group, the default one is used. You can also make custom security groups with rules for your store. It gives you more control over traffic.
Key Points of Security Groups
Traffic Control
Stateful
Flexible rule
Layer of Defense
Only allowed rules
Let's dive into creating Security Groups.
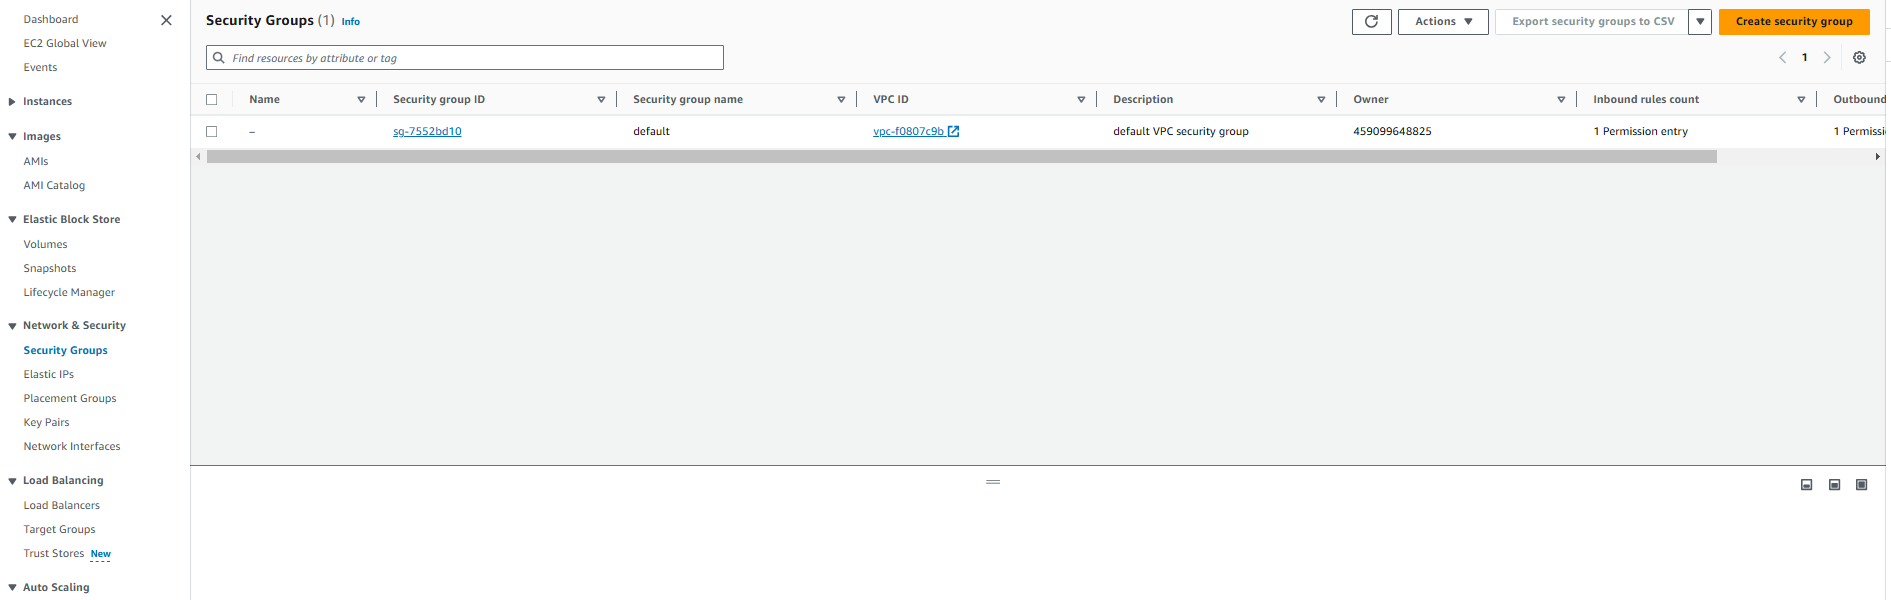
To create a Security group, click “Security Groups” in the EC2 console left hand menu and click “Create security group”.
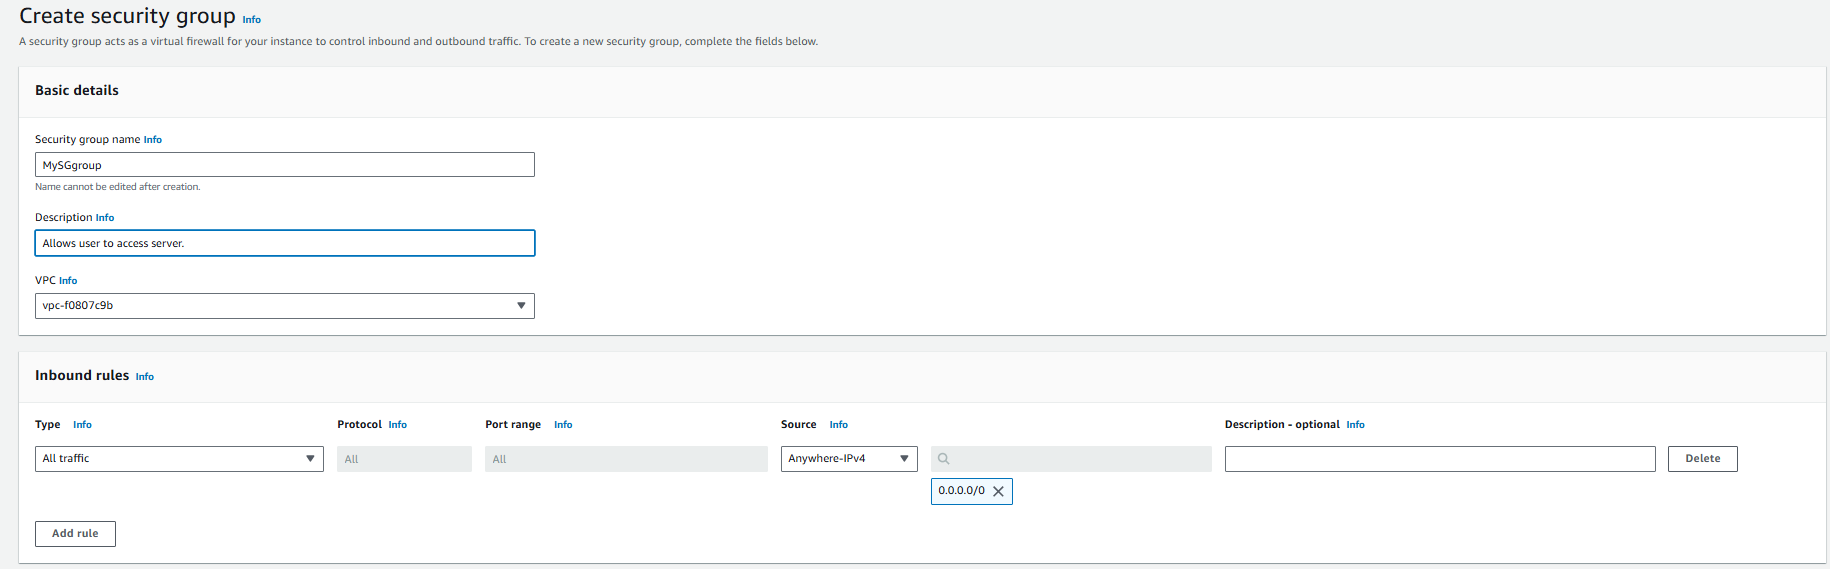
Name your Security group, provide description and add inbound rule.
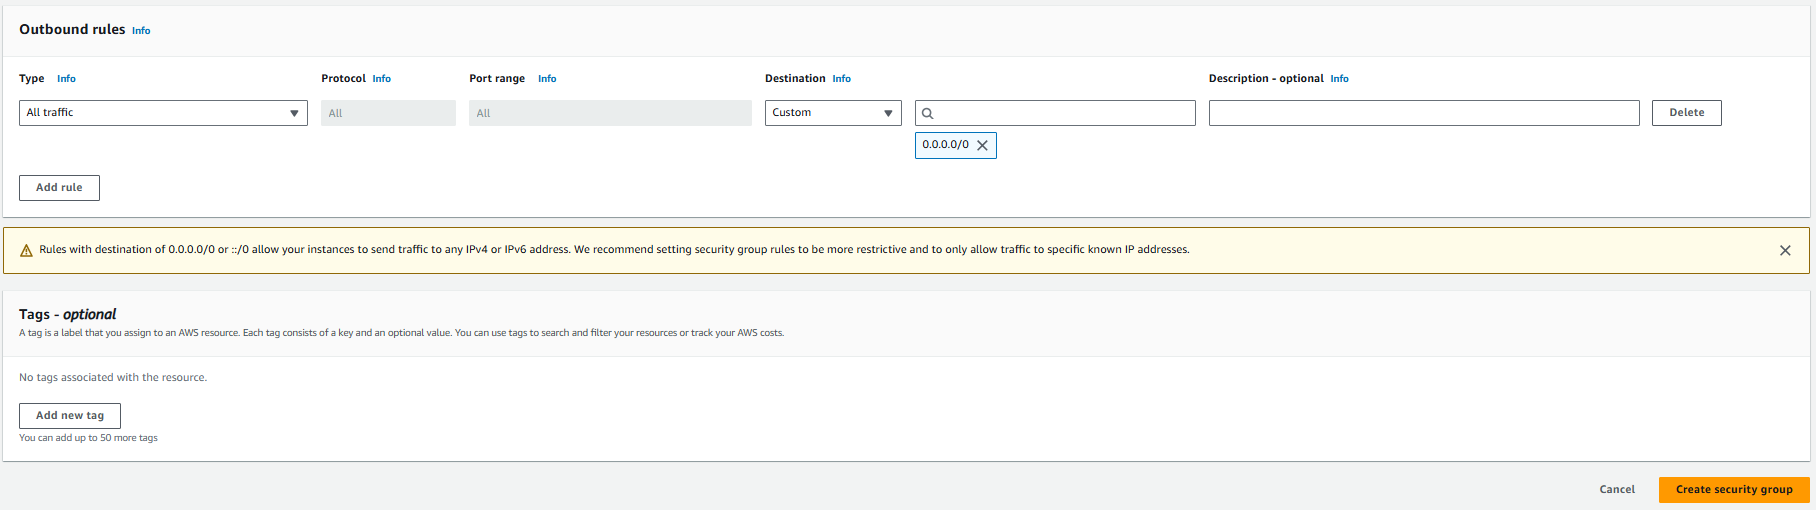
Click on “create security group”. FYI : Generally Outbound rules are “All traffic”
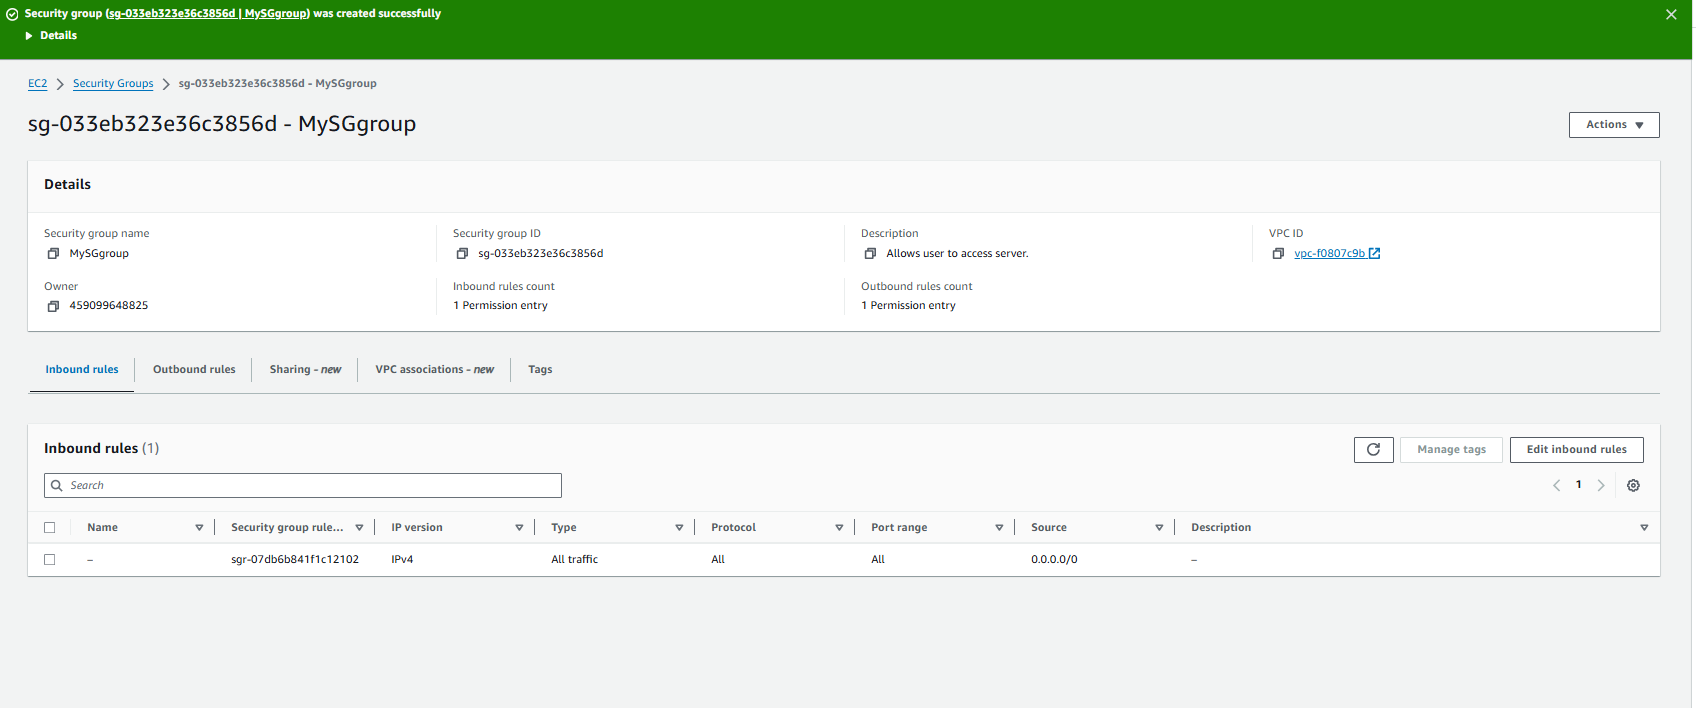
Security group is created
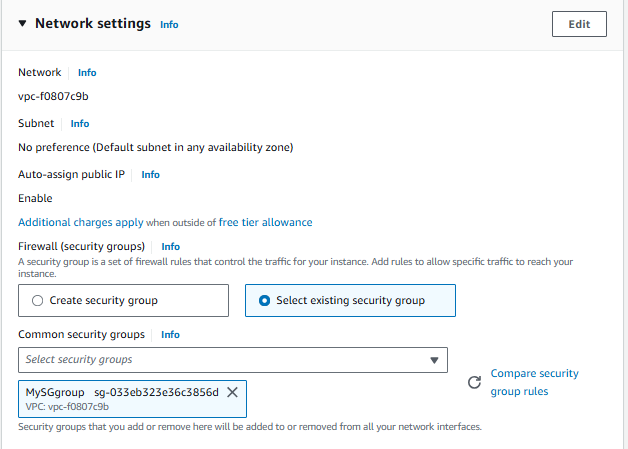
When creating an EC2 instance, you can assign the Security Group you created from the Network settings.
Key Pair
AWS uses public-key cryptography to encrypt and decrypt login information.
AWS only stores the public key, and the user stores the private key.
Generate Key Pair
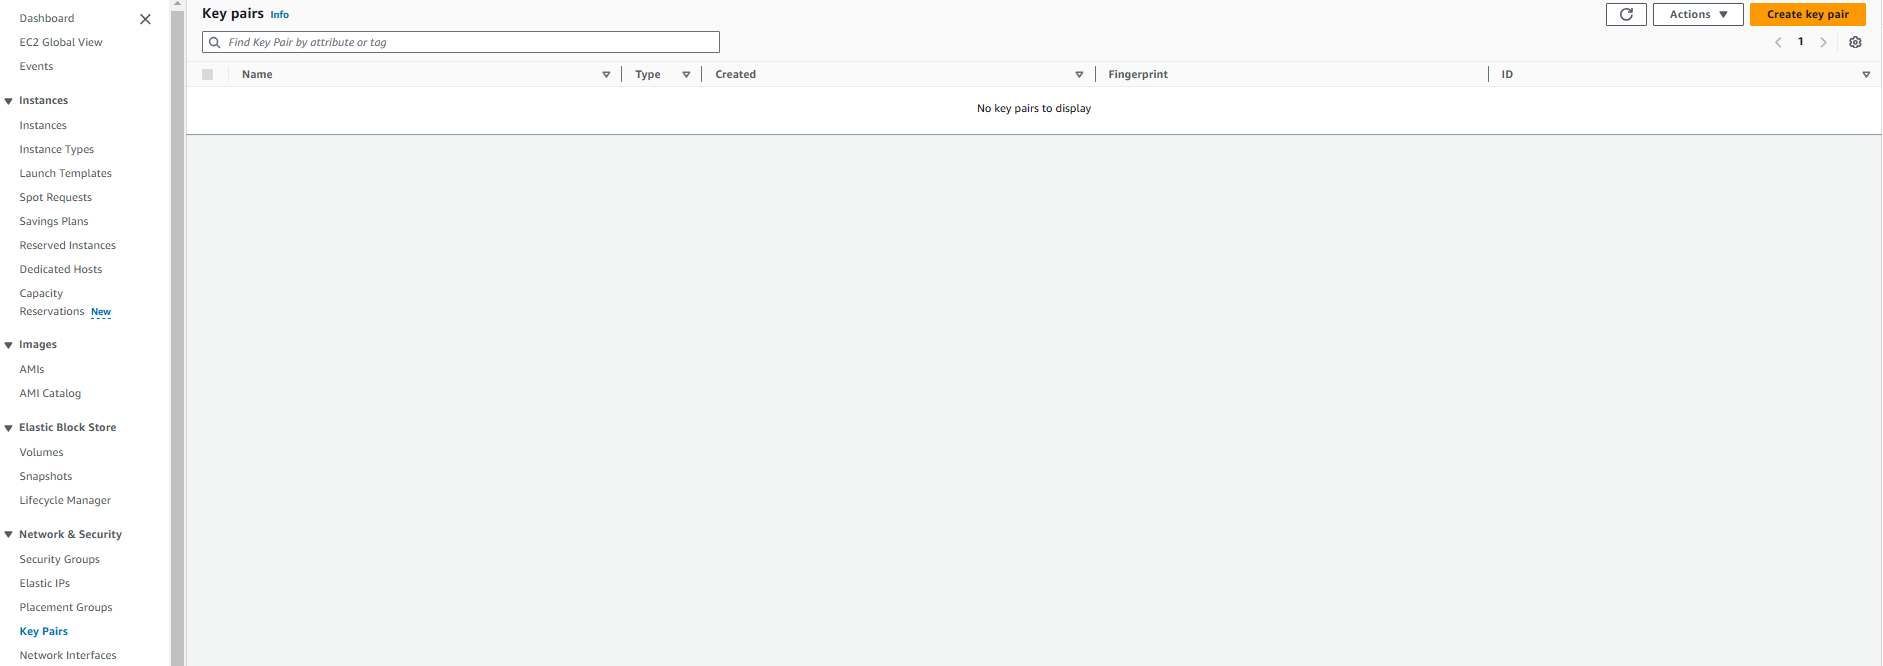
To generate a Key Pair, click “Key Pairs” in the EC2 console left hand menu and click “Create key pair”.
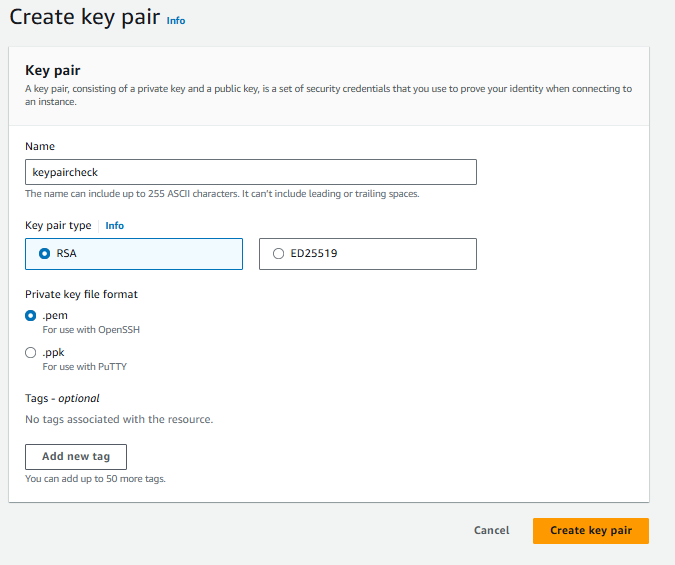
Name the key pair, then select "RSA" as the key pair type and ".pem" as the private key file format. Click on “Create key pair”
The “.pem” file will be downloaded. This file should be kept secure.

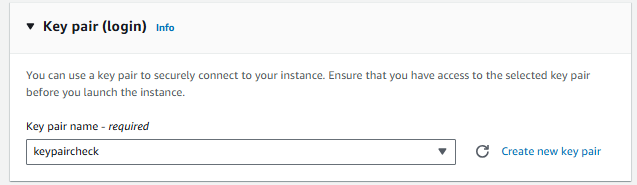
While creating an EC2 instance, assign the key pair.
When connecting to an EC2 instance, go to the "SSH client" tab.
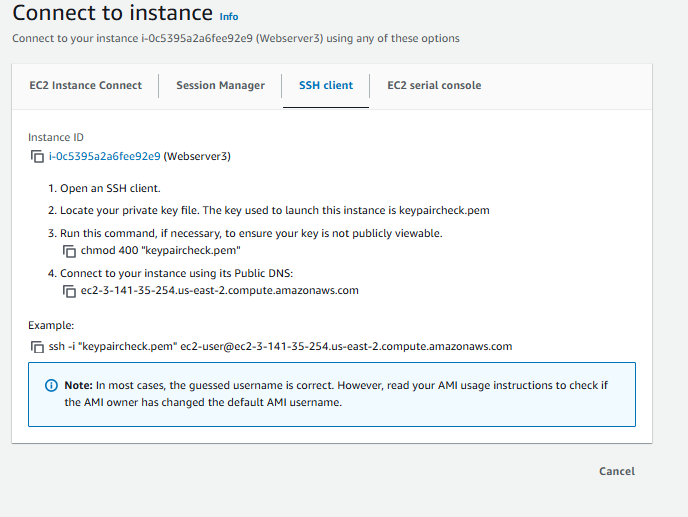
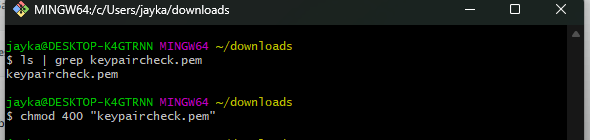
Open Git Bash and go to the downloads folder. Then, copy and paste the command from step 3 in the SSH client tab.
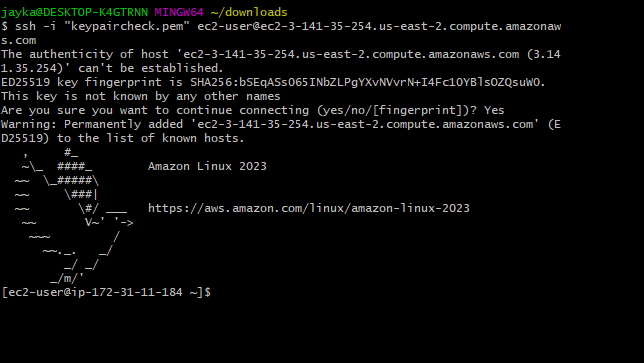
Copy paste command from “Example” from SSH client tab. Enter Yes and you are able to access EC2 server remotely.
Features of EC2
Virtual Computing Environments, known as instances
Preconfigured template for your instance is known as AMI
Various configuration of CPU, memory, storage and network capacity is Instance type
Secure login information for your instance using Key pairs
Storage volumes for temporary data that's deleted when hardware fails or terminate your instance, known as instance store volumes
Persistent storage volumes for your data using Amazon Elastic Block Store (Amazon EBS), known as Amazon EBS volumes
A firewall that enables you to specify the protocols, ports, and source IP ranges that can reach your instances using security groups
Metadata, known as tags, that you can create and assign to your Amazon EC2 resources